![]()
MUSTANG C-PILLAR FILLER PANEL
INSTALLATION GUIDE
(Mirror install below)
The '65 Mustang C-Pillar installation is not that difficult once you realize some simple steps. You will most likely lose your panels when you first try it, just as I did, but if you follow these simple steps you should have no problems. I did 25 drag race cars in one sitting and did not lose or drop a single panel by following these simple steps. Review this guide before you attempt to even remove the panels from the sprue.
NOTE: There are 2 different designs of panels on the sprue. One is a solid flat panel with rivets. The other is the factory style louvered panel. I show the louvered panel installation in my guide.

Set up a clean flat area to work on. Paper towels or something semi-soft is good so if you do drop a part it doesn't go flying away. Have some M.E.K. (Methyl Ethyl Ketone) or other good plastic cement to use. A small screwdriver to apply the glue. You are ready to install the C-Pillar filler panels.
Find the matching panels you have decided to use.
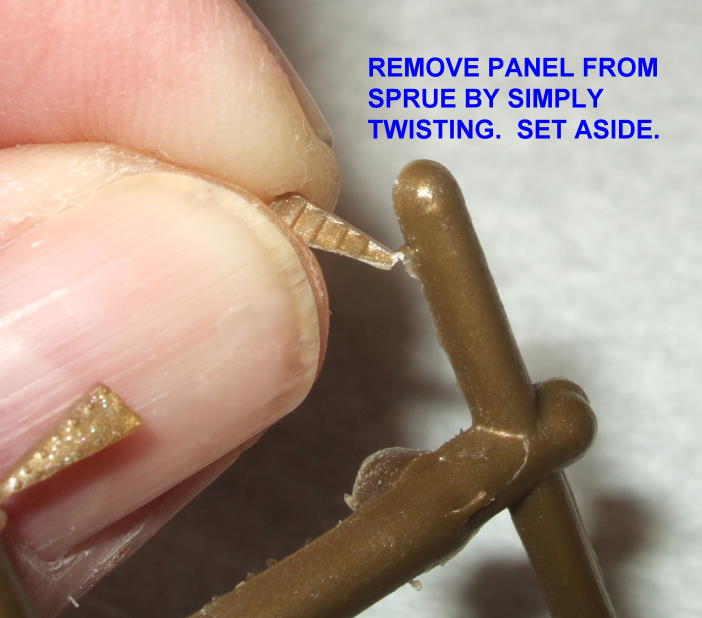
Simply twist parts off of sprue with your fingers and set panels aside.

Pick up your first panel and notice the leading edge is tapered somewhat.
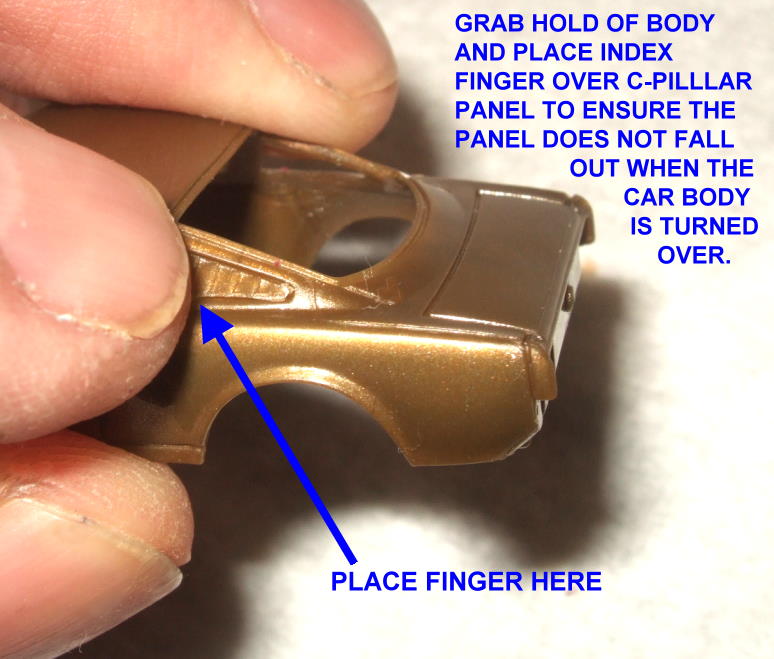
Look at your car body and determine which side fits your panel.
Place your finger under the appropriate open C-panel. This will prevent the panel from falling thru the opening.
You can use tape if you wish.

The panel does have some angled "V" sides so it should nest in the opening once it is set properly.
You can do use tape if you wish.
Move your finger to the wide part of the filler panel only holding it in place with finger on the wide 1/3 of the panel.
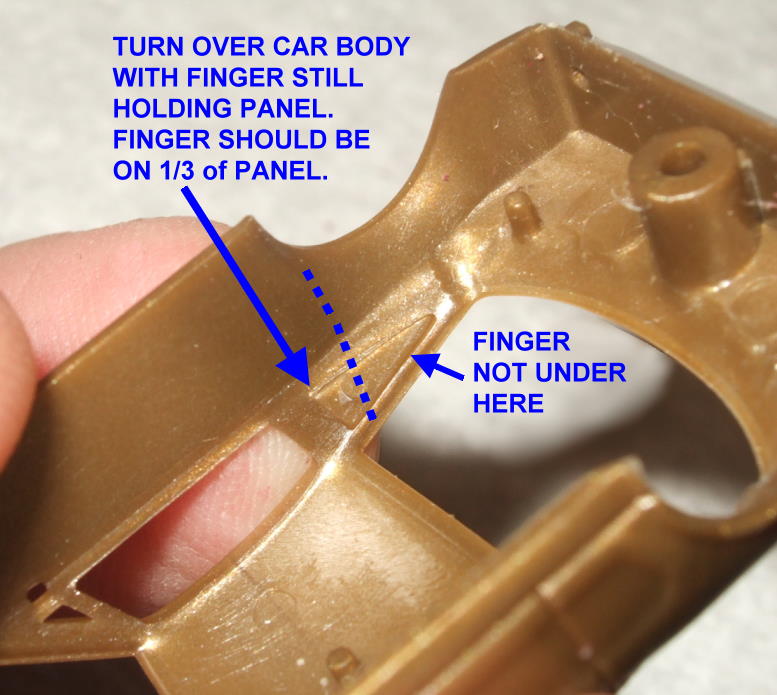
Gently turn body over.

Take you small screw driver and dip it into the plastic glue.

Apply a small amount of glue onto the smallest rearmost portion of the panel.
The glue will want to wick thru, so quickly then remove your finger.
The glue now holds the panel in place.
Apply more glue now (still from the underside) to the front wider portion of the filler panel.
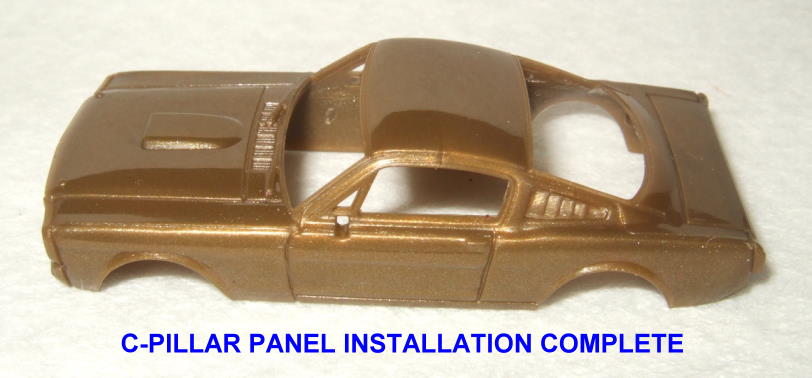
Set your car body down and let glue setup.
Enjoy!
MUSTANG CHROME MIRRORS
INSTALLATION GUIDE
The '65 Mustang mirrors are tiny and easy to lose, but if you follow these simple steps, you'll find the mirrors extremely easy to install. Review this guide before you attempt to even remove the mirrors from the sprue.
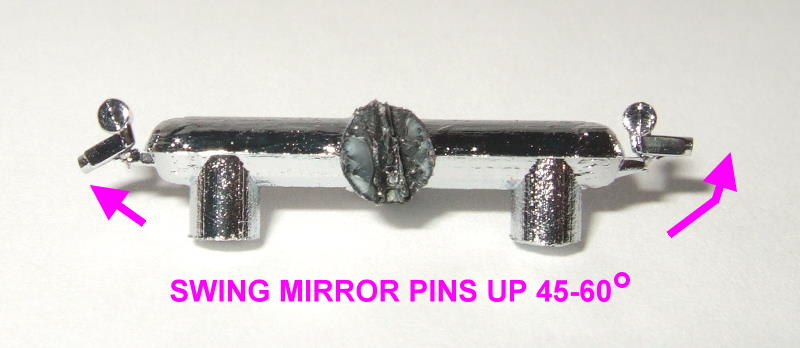
LEAVE MIRRORS ON SPRUE! DO NOT ATTEMPT TO REMOVE THEM FROM THE SPRUE!

Locate the small sprue with 2 chrome mirrors on the end. The mirror stems should be pointing down. Carefully rotate mirror stems out and up in a 45 to 60 degree angle. Leave on sprue this way.
The mirrors have a flat side and pointed side. The pointed side goes to the front of the car. Carefully insert mirror stem into hole of car body behind A-pillar.
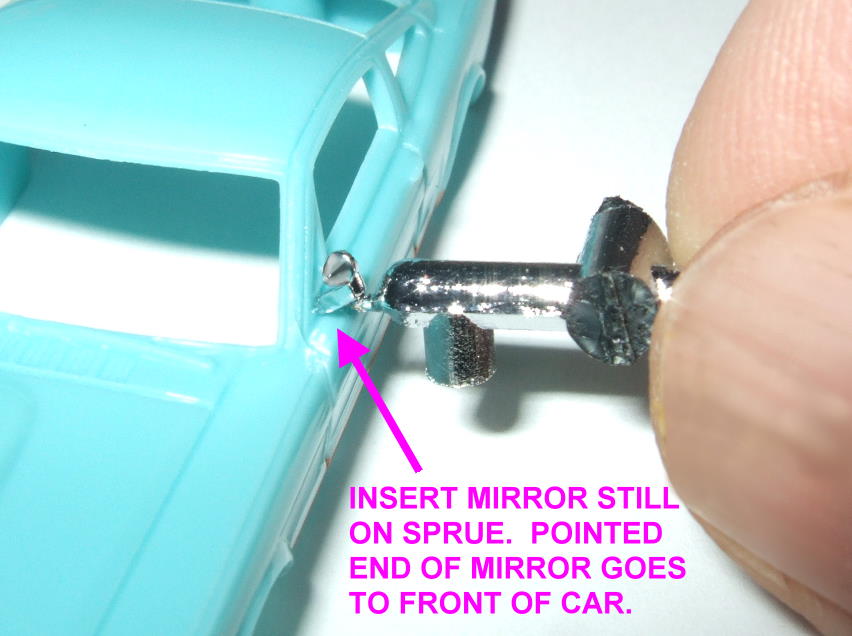
Using your finger and fingernail push and hold the mirror into the hole and twist sprue to break away mirror. Once the mirror is loose from the sprue use your fingernail to push the mirror into the body and fully insert the mirror.

Secure the mirror my melting mirror stem on inside of body or use your favorite glue.
NEED MUSTANG BODIES?
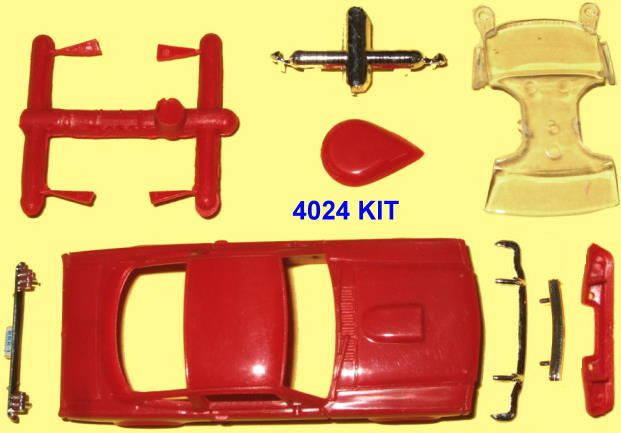
4024 FORD MUSTANG RACE BODY KITS
For more details
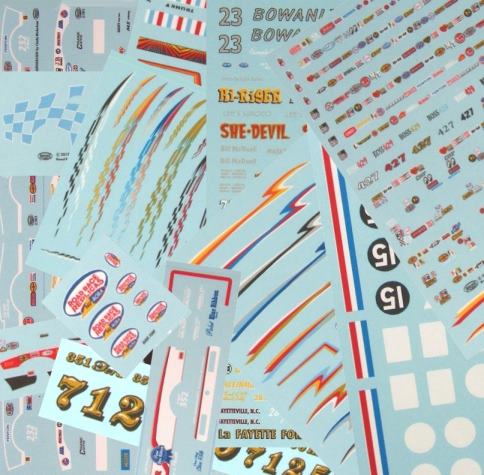
Click for details on our OTHER GREAT DECALS!
...OUR OTHER GREAT '69 & '65 MUSTANGS
ElCaminos, and Legendary GTs


For more details CLICK HERE!
-----------
Would you like a Catalog List of ALL available R.R.R. PARTS?
Click Here
Remember, all reproduction parts are

Assembled here in the USA
Now at JAG HOBBIES
www.jaghobbies.com


(C) Copyright 2024, Road Race Replicas
Images and information are not to be copied or reproduced without written permission from Road Race Replicas.